Decorating Wooden Pumpkins
[anvplayer video=”5143987″ station=”998128″]
Jen Appleberry from Appleberry’s Attic shows us 4 fun, creative and versatile ways to take a simple store bought wood pumpkin and bring it to life!!! These make for a fun activity leading up to Halloween or maybe at your Halloween Get Together! Kids and Kids at heart LOVE to create! 
Check out Appleberry’s Attic Craft Studio in Down Town Anoka!
NEW Craft Classes just launched so head to the website to check them out and get signed up! Believe it or not, with Halloween almost here that means Christmas is around the corner and Appleberry’s Attics CHRISTMAS CRAFT NIGHT is the BIGGEST Christmas Party of the Year! Tickets on sale now here.
- PAINT it: paint your pumpkin any color and paint a jack o lantern face on it! *Great for littles
- PAPER it: add pattern & texture to your pumpkin by covering it with super cute scrapbook paper!
- PATTERN it: paint polk-a-dots, stripes, or any other fun, abstract pattern you can think of!
- POUR it: By simply adding FLOTROL to acrylic paint you can create fluid moving paint and an exciting, satisfying form of art!
PAINT POUR INSTRUCTIONS:
* Mix Flotrol and Acrylic Paint with a 1 to 1 equal parts ratio.
* Give it a good shake to mix throughly.
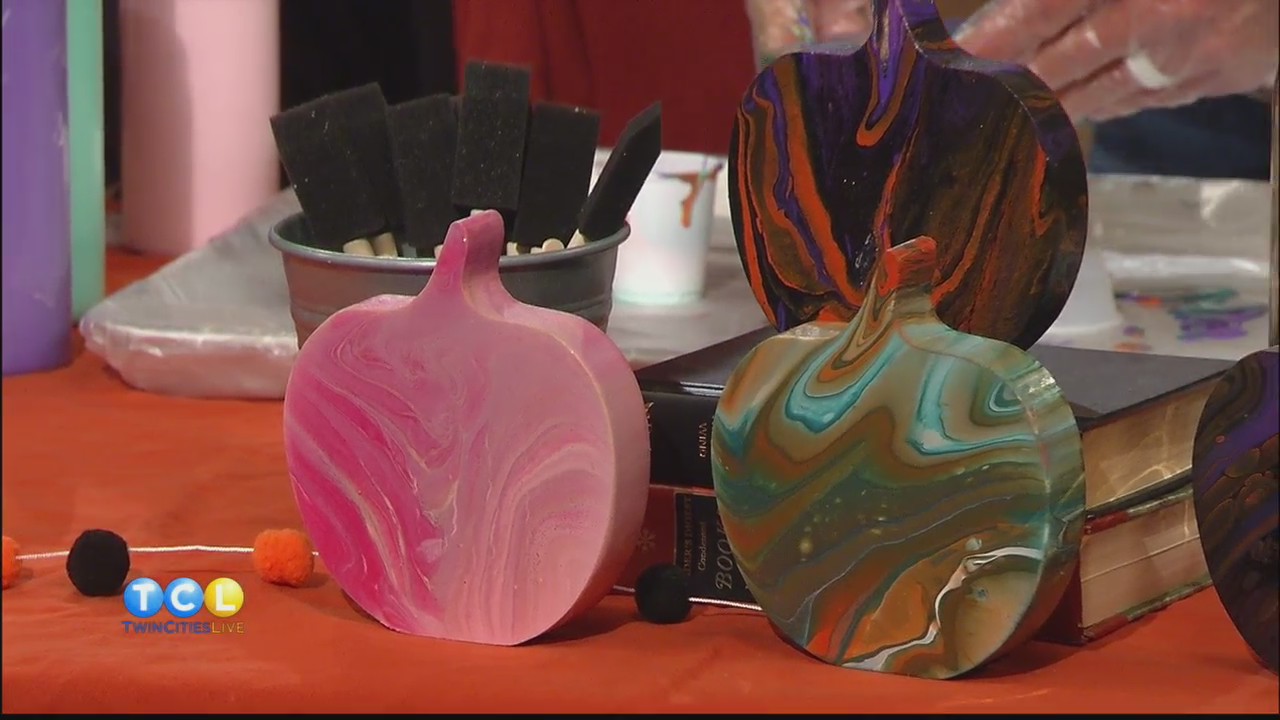
* Layer your different colors of mixed paint into a cup.
* Slowly pour your paint. out of the cup and onto to your surface of choice.
* On the show we will showcase 2 different pour techniques…. The “S” Pour and The Ring Pour.
* Let dry for 24 hours then apply a coat of clear epoxy if wanting the “glass” look.